Showing posts with label other2. Show all posts

August 01, 2014

Mockito Junit - Hibernate Code Example

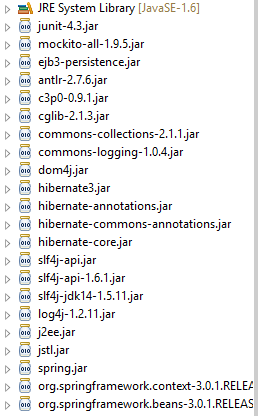
Mockito Junit Hibernate example required source code attached here. Please download required jars download from findJar site.

If you want work with much more examples, please Click Me
Read more ...

Mockito Junit Code Examples

Mockito is an unwrap source testing framework for Java released under the MIT License. The framework allows the creation of test double objects (mock objects) inautomated unit tests for the purpose of Test-driven Development (TDD) or Behavior Driven Development (BDD).
Unit testing is used to test a single programming unit Ex: a class or a method, in-fact almost every Java developer write unit test on per method basis. The Stub and Mock objects are two concepts, which helps during unit testing, they are not real world objects, but act like real world objects for unit testing purpose. 
The common testing for approach to test a unit, which depends on other unit is by using Stubs and Mock objects. They help to reduce complexity, which may be require to create actual dependent object. In this tutorial, we will learn few basic difference between Stub and Mock object in Java Unit testing. This post is rather small to tackle this whole topic, at best it just provide an introduction.

JUnit is the most popular framework for unit testing Java code. I am assuming you can download Mockito and get it in your classpath.  So I'll start with tests that implement some of the requirements from here (https://code.google.com/p/mockito/downloads/list). However, in a nutshell:Download mockito-all-1.7.jar from here. Create a new Java project in your favorite IDE Add that jar to your project's classpath, Add JUnit 4 to your project's classpath. More Examples( https://code.google.com/p/mockito/ )
Mockito API: http://docs.mockito.googlecode.com/hg/latest/org/mockito/Mockito.html )

package com.mockito;
import java.io.IOException;
import java.io.OutputStream;
import java.io.OutputStreamWriter;
import java.util.Iterator;
import java.util.List;
import org.hamcrest.BaseMatcher;
import org.hamcrest.Description;
import org.junit.Assert;
import org.junit.Test;
import org.mockito.Mockito;
/**
 * I am assuming you can download Mockito and get it in your classpath.
 * So I'll start with tests that implement some of the requirements from here
 * (https://code.google.com/p/mockito/downloads/list).
 * However, in a nutshell:Download mockito-all-1.7.jar from here.
 * Create a new Java project in your favorite IDE Add that jar to your project's classpath,
 * Add JUnit 4 to your project's classpath
 * More Examples( https://code.google.com/p/mockito/ )
 * Mockito API ( http://docs.mockito.googlecode.com/hg/latest/org/mockito/Mockito.html )
 * @author Myjavacafe
 */
public class MockitoTest {
                public static void main(String[] args) {
                                // TODO Auto-generated method stub
                }
/**
* This example creates a mock iterator and makes it return “Hello” the first time method
* next() is called. Calls after that return “World”. Then we can run normal assertions.
*/
                @Test
                public void iterator_will_return_hello_world() {
                                // arrange
                                Iterator i = Mockito.mock(Iterator.class);
                                Mockito.when(i.next()).thenReturn("Hello").thenReturn("World");
                                // act
                                String result = i.next() + " " + i.next();
                                // assert
                                Assert.assertEquals("Hello World", result);
                }
               
               
                /**
                 * Its creates a stub Comparable object and returns 1 if it is compared to
                 * a particular String value (“Test” in this case).
                 */
                @Test
                public void with_arguments(){
                                //Set the class to mockito
                                Comparable c = Mockito.mock(Comparable.class);
                                //Set the values to mockito object
                                Mockito.when(c.compareTo("Test")).thenReturn(1);
                                //set the
                                Assert.assertEquals(1,c.compareTo("Test"));
                }
               
                /**
                 * The method has arguments but you really don’t care what gets passed or cannot predict it,
                 * use anyInt() (and alternative values for other types.
                 * This stub comparable returns -1 regardless of the actual method argument.
                 */
                @Test
                public void with_unspecified_arguments(){
                                Comparable c = Mockito.mock(Comparable.class);
                                Mockito.when(c.compareTo(Mockito.anyInt())).thenReturn(-1);
                                Assert.assertEquals(-1,c.compareTo(6));
                }
               
                /**
                 * The syntax is doReturn(result).when(mock_object).void_method_call();
                 * Instead of returning, you can also use .thenThrow() or doThrow() for void methods.
                 * This example throws an IOException when the mock OutputStream close method is called.
                 */
                @Test(expected=IOException.class)
                public void OutputStreamWriter_rethrows_an_exception_from_OutputStream()
                                throws IOException{
                                OutputStream mock = Mockito.mock(OutputStream.class);
                                OutputStreamWriter osw=new OutputStreamWriter(mock);
                                Mockito.doThrow(new IOException()).when(mock).close();
                                osw.close();
                }
               
                /**
                 * We verify easily that the OutputStreamWriter rethrows the exception of the wrapped output stream.
                 * To verify actual calls to underlying objects (typical mock object usage),
                 * we can use verify(mock_object).method_call; This example will verify that OutputStreamWriter
                 * propagates the close method call to the wrapped output stream.
                 */
                @Test
                public void OutputStreamWriter_Closes_OutputStream_on_Close()
                                 throws IOException{
                                OutputStream mock = Mockito.mock(OutputStream.class);
                                OutputStreamWriter osw=new OutputStreamWriter(mock);
                                osw.close();
                                Mockito.verify(mock).close();
                }
               
                /**
                 * We can’t mix literals and matchers, so if you have multiple arguments they all have to be either
                 * literals or matchers. Use eq(value) matcher to convert a literal into a matcher that compares on value.
                 * Mockito comes with lots of matchers already built in, but sometimes you need a bit more flexibility.
                 * For example, OutputStreamWriter will buffer output and then send it to the wrapped object when flushed,
                 * but we don’t know how big the buffer is up front. So we can’t use equality matching.
                 * However, we can supply our own matcher.
                 */
                @Test
                public void OutputStreamWriter_Buffers_And_Forwards_To_OutputStream()
                                throws IOException{                     
                                OutputStream mock = Mockito.mock(OutputStream.class);
                                OutputStreamWriter osw=new OutputStreamWriter(mock);
                                osw.write('a');
                                osw.flush();
                                // can't do this as we don't know how long the array is going to be
                                // verify(mock).write(new byte[]{'a'},0,1);

                                BaseMatcher arrayStartingWithA=new BaseMatcher(){
                                                // check that first character is A
                                                @Override
                                                public boolean matches(Object item) {
                                                                byte[] actual=(byte[]) item;
                                                                return actual[0]=='a';
                                                }
                                                @Override
                                                public void describeTo(Description description) {
                                                                // TODO Auto-generated method stub
                                                               
                                                }
                                };
                // check that first character of the array is A, and that the other two arguments are 0 and 1
                                Mockito.verify(mock).write((byte[]) Mockito.argThat(arrayStartingWithA), Mockito.eq(0),Mockito.eq(1));
//                            Mockito.verify(mock).write(Mockito.eq(0));
                }
}
Do you want to download this example, please Click Me
Do you want to know more about Mockito, please Click Me
Do you want  to know more about SprignBoot MicroServices Mockito ClickMe
Read more ...

October 10, 2012

How to resolve following message - Error 1327, Invalid Drive F or I (any drive) ?

I have solved it and if anyone has the same problem in the future follow these instructions:-

Hit Start, Run and type Regedit

Find the following HKEY_CURRENT_USER\Software\Microsoft\Windows| CurrentVersion\ Explorer\User Shell Folders

In the right pane - see if these is any entries which has an F or any other alphabelts not C (your OP folder) modify data to C:\

Hopefully it works for others.

Read more ...

June 29, 2012

Setting Up Eclipse with Java 1.6 on Windows


Step 1 - Download Java
Step 2 - Install Java
Step 3 - Set the PATH
Step 4 - Set the CLASSPATH
Step 5 - Test the Java installation
Step 6 - Download and install Eclipse
Step 7 - Test the Eclipse installation
Step 1     Download Java 1.6 package for Windows
Click the Download button alongside the label  JDK 6 Update 2 (or similar). On that page, accept the license agreement near the top of the page and download either the online or offline Windows Platform installation file. The offline option is a big file (c. 66MB) which includes all of the Java language and can be used to install even when an internet connection is not available. The online option is a small file (c. 0.4MB) that when run downloads Java over an internet connection as installation proceeds. It is recommended that you save the installer file to the Desktop so that it can be found easily. 


Step 2     Install the Java 1.6 package.
a. Double-click the file that you just downloaded. The name should be something similar to jdk-6u2-windows-i586-p.exe or, if you chose the online installation option,jdk-6u2-windows-i586-p-iftw.exe

b. Accept the License Agreement.

c. Accept all the default choices. In other words, just keep clicking "Next".

d. Wait for the installation to complete.


Step 3     Update the PATH environment variable.
(The following is adapted from Sun's Installation Notes for JDK 1.6 Microsoft Windows)

You can run the JDK without setting the PATH variable, or you can optionally set it as a convenience. To save yourself a lot of careful typing, it is highly recommended that you set the path variable.
Set the PATH variable if you want to be able to conveniently run the JDK executables (javac.exejava.exejavadoc.exe, etc.) from any directory without having to type the full path of the command. If you don't set the PATH variable, you need to specify the full path to the executable every time you run it, such as:
   C:> "\Program Files\Java\jdk1.6.0_\bin\javac" MyClass.java

It's useful to set the PATH permanently so it will persist after rebooting.
To set the PATH permanently, add the full path of the jdk1.6.0_\bin directory to the PATH variable. Typically this full path looks something like C:\Program Files\Java\jdk1.6.0_\bin, where  is a two-digit number. Set the PATH as follows, according to whether you are on Microsoft Windows NT, XP, 98, 2000, or ME.
Microsoft Windows NT, 2000, and XP - To set the PATH permanently:
  1. Choose Start, Settings, Control Panel, and double-click System. On Microsoft Windows NT, select the Environment tab; on Microsoft Windows XP and 2000 select the Advanced tab and then Environment Variables. Look for "Path" in the User Variables and System Variables. If you're not sure where to add the path, add it to the right end of the "Path" in the User Variables. A typical value for PATH is:
       C:\Program Files\Java\jdk1.6.0_\bin 
    Where is the latest version number. For example, if you downloaded jdk1.6.0_02, then the value to add to the path is:
       C:\Program Files\Java\jdk1.6.0_02\bin 
                                                                                              Capitalization doesn't matter. Click "Set", "OK" or "Apply".The PATH can be a series of directories separated by semi-colons (;). Microsoft Windows looks for programs in the PATH directories in order, from left to right. You should only have one bin directory for a JDK in the path at a time (those following the first are ignored), so if one is already present, you can update it to jdk1.6.0_\bin.
  2. The new path takes effect in each new Command Prompt window you open after setting the PATH variable.
Microsoft Windows 98 - To set the PATH permanently, open the AUTOEXEC.BAT file and add or change the PATH statement as follows:
  1. Start the system editor. Choose "Start", "Run" and enter sysedit, then click OK. The system editor starts up with several windows showing. Go to the window that is displaying AUTOEXEC.BAT
  2. Look for the PATH statement. (If you don't have one, add one.) If you're not sure where to add the path, add it to the right end of the PATH. For example, in the following PATH statement, we have added the bin directory at the right end:
       PATH C:\WINDOWS;C:\WINDOWS\COMMAND;"C:\PROGRAM FILES\JAVA\JDK1.6.0_\BIN" 
    Capitalization doesn't matter. The PATH can be a series of directories separated by semi-colons (;). Microsoft Windows searches for programs in the PATH directories in order, from left to right. You should only have one bin directory for a JDK in the path at a time (those following the first are ignored), so if one is already present, you can update it to jdk1.6.0_.
  3. To make the path take effect in the current Command Prompt window, execute the following:
       C:> c:\autoexec.bat
    
        
    To find out the current value of your PATH, to see if it took effect, at the command prompt, type:
       C:> path
    
        
Microsoft Windows ME - To set the PATH permanently:
From the start menu, choose programs, accessories, system tools, and system information. This brings up a window titled "Microsoft Help and Support". From here, choose the tools menu, then select the system configuration utility. Click the environment tab, select PATH and press the edit button. Now add the JDK to your path as described in step b above. After you've added the location of the JDK to your PATH, save the changes and reboot your machine when prompted.


Step 4     Set the CLASSPATH environment variable.
The CLASSPATH variable tells Java where to look for *.class bytecode files. Bytecode is created when you compile your *.java files. Set the CLASSPATH as follows, according to whether you are on Microsoft Windows NT, XP, 98, 2000, or ME.
Microsoft Windows NT, 2000, and XP - To set the CLASSPATH:
  1. Choose Start, Settings, Control Panel, and double-click System. On Microsoft Windows NT, select the Environment tab; on Microsoft Windows 2000 or XP select the Advanced tab and then Environment Variables. Look for "classpath" in the User Variables and System Variables, then click Edit. If no classpath variable exists, create it by clicking New and adding "classpath" to the User Variables. A typical value for CLASSPATH is:
       .;..
    The '.' represents your current directory, allowing you to compile and run code in your current directory (as shown in the command line of your command window). The '..' represents the folder above the current directory. Together, the '.' and '..' cover most situations where you need to compile and run programs. The semi-colon ';' separates these entries. The CLASSPATH can contain multiple directories separated by semi-colons. 
    Click "Set", "OK" or "Apply".
  2. The new classpath takes effect in each new Command Prompt window you open after setting the CLASSPATH variable. 
Microsoft Windows 98 - To set the CLASSPATH permanently, open the AUTOEXEC.BAT file and add or change the CLASSPATH statement as follows:
  1. Start the system editor. Choose "Start", "Run" and enter sysedit, then click OK. The system editor starts up with several windows showing. Go to the window that is displaying AUTOEXEC.BAT
  2. Look for the CLASSPATH statement. (If you don't have one, add one.) The classpath should contain a '.' and a '..'. If you're not sure where to add them, put them at the right end of the CLASSPATH. For example, in the following CLASSPATH statement, we have added the '.' and '..' directories at the right end:
       CLASSPATH C:\someFolder\someClasses.jar;..;.
    The '.' represents your current directory, allowing you to compile and run code in your current directory (as shown in the command line of your command window). The '..' represents the folder above the current directory. Together, the '.' and '..' cover most situations where you need to compile and run programs. The semi-colon ';' separates these entries. The CLASSPATH can contain multiple directories separated by semi-colons.
  3. To make the classpath take effect in the current Command Prompt window, execute the following:
       C:> c:\autoexec.bat
    To find out the current value of your CLASSPATH, to see if it took effect, at the command prompt, type:
       C:> classpath
        
Microsoft Windows ME - To set the CLASSPATH permanently:
From the start menu, choose programs, accessories, system tools, and system information. This brings up a window titled "Microsoft Help and Support". From here, choose the tools menu, then select the system configuration utility. Click the environment tab, select CLASSPATH and press the edit button. Now add '.' and '..' to your path as described in step b above. Then save the changes and reboot your machine when prompted.


Step 5     Test your Java installation.

a. Open a command window and create a test directory.

    1. Go to Start >> Run... then type cmd and click OK.
    2. Type cd \ and press Enter.
    3. The bottom line should read C:\>
    4. Type mkdir test and press Enter to create a new directory for your testing.
    5. Type cd testand press Enter to enter the directory. The bottom line of the command window should read  C:\test>

      b. Open a text editor and create a small Java program.
      Open WordPad or NotePad (in XP these can be found at Start >> All Programs >> Accessories) and copy in the following simple program:
      public class MyTestApplication {
      
        public static void main(String[] args) {
      
          System.out.println("Hello World!");
        }
      }

      c. Save the program in the test directory. 

      In the text editor menu, choose File >> Save. Then in the File Name field near the bottom of the dialog box, type the following exactly -

         C:\test\MyTestApplication.java
      and click Save.


      d. Confirm the save.
      In your command window, type dir. You should see something similar to -

      C:\test>dir
       Volume in drive C has no label.
       Volume Serial Number is 3C4D-5998

       Directory of C:\test

      29/01/2006  08:20 PM   
                .
      29/01/2006  08:20 PM              ..
      29/01/2006  08:20 PM               129 MyTestApplication.java
                     1 File(s)            129 bytes
                     2 Dir(s)  59,076,812,800 bytes free

      C:\test>


      e. Compile the program.
      Type javac MyTestApplication.java and press Enter. You should see -
      C:\test>javac MyTestApplication.java
      
      C:\test>
      There are two problems that you may encounter at this step.

      Problem 1
      If instead you get the following message -
      C:\test>javac MyTestApplication.java
      'javac' is not recognized as an internal or external command,
      operable program or batch file.
      
      C:\test>
      then Java has not been correctly installed. Perform the following tests :

          1) Check that Java has been correctly downloaded and installed. In particular, look for the directory
      C:\Program Files\Java\jdk1.6.0_\bin. If you cannot find a Java folder in the Program Files folder, then go back to Step 1 now.

          2) Check that the PATH variable has been set correctly. Type echo %path%. You should see something similar to -
      C:\test>echo %path%
      C:\Perl\bin\;c:\programfiles\imagemagick;C:\texmf\miktex\bin;C:\WINDOWS\system32
      ;C:\WINDOWS;C:\WINDOWS\System32\Wbem;C:\Program Files\ATI Technologies\ATI Contr
      ol Panel;C:\Program Files\SecureCRT\;C:\Program Files\Java\jdk1.6.0_02\bin
      
      C:\test>
      If you do not see an entry anywhere in your PATH similar to the one above in bold, then go back to Step 3 now.


      Problem 2
      If instead you get the following message -
      C:\test>javac MyTestApplication.java
      error: cannot read: MyTestApplication.java
      1 error
      
      C:\test>
      then either the CLASSPATH variable is not set or your file is not in the test folder. Perform the following tests:

          1) Check that the CLASSPATH variable has been set correctly. Type echo %classpath%. You should see something similar to -
      C:\test>echo %classpath%
      .;..;C:\someFolder\someClasses.jar
      
      C:\test>
      Note that the classpath may have been automatically updated to contain the location of various class files, and therefore may be longer than the example above. Just make sure that it contains a '.' with a ';' to separate it from other entries. Go back to Step 4 above to edit the classpath.

         2) Make sure you are in the test folder. If you are not, then use the cd command to navigate to the test folder. Once you are in the test folder, type dir at the command line to examine its contents. If you do not see an entry for MyTestApplication.java then Go back to Step 5b above.


      f. Confirm the compilation.
      Type  dir. You should see something similar to -
      C:\test>dir
       Volume in drive C has no label.
       Volume Serial Number is 3C4D-5998
      
       Directory of C:\test
      
      29/01/2006  08:28 PM              .
      29/01/2006  08:28 PM              ..
      29/01/2006  08:28 PM               440 MyTestApplication.class
      29/01/2006  08:20 PM               129 MyTestApplication.java
                     2 File(s)            569 bytes
                     2 Dir(s)  59,076,796,416 bytes free
      
      C:\test>
      If compilation was successful, a *.class file should be present as shown.


      g. Run the program.

      Type java MyTestApplication to run the program. You should see -
      C:\test>java MyTestApplication
      Hello World!
      
      C:\test>
      There is one common problem at this step.

      Problem
      If you get the following message -
      C:\>java MyTestApplication
      Exception in thread "main" java.lang.NoClassDefFoundError: MyTestApplication
      
      C:\>
      then either your class file is not in the test folder (type dir at the command line to make sure), or you are in the wrong directory as in this example, where the javacommand has been typed in C: rather than C:\testGo back to Step 5b above and make sure that you have performed all steps correctly.


      Step 6     
      Download and install Eclipse.
      1. Download Eclipse from the Eclipse downloads page.
      2. Click the link next to "Download now".
      3. If possible, choose a mirror close to your location (e.g. Portland, if you are in Vancouver).
      4. Wait for your download to finish. This may take some time: the installer is a large file (>100MB).
      5. Unzip the downloaded file to C:\Program Files. Again, this may take some time.
      6. In C:\Program Files\eclipse, right-click on eclipse.exe and select Create Shortcut. Rename the shortcut to eclipse and drag it to your Desktop. Then close theeclipse folder.
      7. On the Desktop, double-click on the eclipse shortcut to start the program.
      8. Workspace Launcher dialog will appear. Select "Use this as the default and do not ask again" and click OK.
      9. Eclipse will start up. Either explore the Overview, Tutorials, etc. or close the Welcome page by clicking on the white X to reveal the Java perspective, where you will do your programming.
      Now set up Eclipse to use the latest version of Java for compiling and running your Java programs. 
      (Note: you need to configure Eclipse to use Java 1.6 or it will use an older Java version by default)
      1. Set the default installed JRE to Java 1.6 (this tells Eclipse which libraries to use):
        • Open the Eclipse Preferences Pane (Window -> Preferences) and go to the Java >> Installed JREs subpane.
        • Check the JRE 1.6.0_ as the default (where is a two digit number representing the version number that you downloaded and installed)
        • Click OK to save the settings.
      2. Set the Java compiler to Java 1.6 (this tells Eclipse which compiler to use):
        • In Eclipse Preferences Pane go to Java >> Compiler >> Compliance Level
        • Select "6.0".
        • Click OK to save the settings.
      Eclipse should then be set up properly to compile and run Java 1.6 programs. 


      Step 7     Test the Eclipse installation.

      Create a new Java project with a class and run it.
      1. In the Java Perspective, right-click in Eclipse's Package Explorer window and select New >> Project....
      2. Select Java Project and Next.
      3. Name the project whatever you like (e.g. 'test'). For now the other options do not matter; just click on Finish.
      4. In the Package Explorer window, right-click on the test package and select New >> Class.
      5. Name the class MyTestApplication. For now the other options do not matter; just click on Finish.
      6. Delete everything in the editor that appears. Copy the following into the editor:
      public class MyTestApplication {
      
        public static void main(String[] args) {
      
          System.out.println("Hello World!");
        }
      }
      7.  In the Eclipse menu bar, select File >> Save. If everything is working properly this program should compile automatically without errors.
      8  Run the program by right-clicking on the MyTextApplication class in the package manager, then select Run As >> Java Application.

        "Hello World!" should appear in the console output.
        Read more ...

        February 11, 2012

        C Interview Questions

        C Questions
        Note : All the programs are tested under Turbo C/C++ compilers. It is assumed that,
         Programs run under DOS environment,
         The underlying machine is an x86 system,
         Program is compiled using Turbo C/C++ compiler.

        The program output may depend on the information based on this assumptions (for example sizeof(int) == 2 may be assumed).
        Predict the output or error(s) for the following:
        1. void main(){
        int const * p=5;printf("%d",++(*p));
        }
        Answer:Compiler error: Cannot modify a constant value.
        Explanation:
        p is a pointer to a "constant integer". But we tried to change the value of the "constant integer".

        2. main(){char s[ ]="man";
        int i;
        for(i=0;s[ i ];i++)
        printf("\n%c%c%c%c",s[ i ],*(s+i),*(i+s),i[s]);
        }
        Answer:
        mmmm
        aaaa
        nnnn
        Explanation:
        s[i], *(i+s), *(s+i), i[s] are all different ways of expressing the same idea. Generally array name is the base address for that array. Here s is the base address. i is the index number/displacement from the base address. So, indirecting it with * is same as s[i]. i[s] may be surprising. But in the case of C it is same as s[i].
        3. main(){
        float me = 1.1;double you = 1.1;
        if(me==you)
        printf("I love U");
        else
        printf("I hate U");
        }
        Answer:
        I hate U
        Explanation:For floating point numbers (float, double, long double) the values cannot be predicted exactly. Depending on the number of bytes, the precession with of the value represented varies. Float takes 4 bytes and long double takes 10 bytes. So float stores 0.9 with less precision than long double.
        Rule of Thumb: Never compare or at-least be cautious when using floating point numbers with relational operators (== , >, <, <=, >=,!= ) .
        4. main(){
        static int var = 5;
        printf("%d ",var--);
        if(var)
        main();
        }
        Answer:5 4 3 2 1
        Explanation:When static storage class is given, it is initialized once. The change in the value of a static variable is retained even between the function calls. Main is also treated like any other ordinary function, which can be called recursively.


        5. main()

        {

        int c[ ]={2.8,3.4,4,6.7,5};

        int j,*p=c,*q=c;

        for(j=0;j<5;j++) {

        printf(" %d ",*c);

        ++q; }

        for(j=0;j<5;j++){

        printf(" %d ",*p);

        ++p; }

        }


        Answer:

        2 2 2 2 2 2 3 4 6 5

        Explanation:

        Initially pointer c is assigned to both p and q. In the first loop, since only q is incremented and not c , the value 2 will be printed 5 times. In second loop p itself is incremented. So the values 2 3 4 6 5 will be printed.


        6. main()

        {

        extern int i;

        i=20;

        printf("%d",i);

        }


        Answer:

        Linker Error : Undefined symbol '_i'

        Explanation:

        extern storage class in the following declaration,

        extern int i;

        specifies to the compiler that the memory for i is allocated in some other program and that address will be given to the current program at the time of linking. But linker finds that no other variable of name i is available in any other program with memory space allocated for it. Hence a linker error has occurred .


        7. main()

        {

        int i=-1,j=-1,k=0,l=2,m;

        m=i++&&j++&&k++

        l++;

        printf("%d %d %d %d %d",i,j,k,l,m);

        }

        Answer:

        0 0 1 3 1

        Explanation :

        Logical operations always give a result of 1 or 0 . And also the logical AND (&&) operator has higher priority over the logical OR (

        ) operator. So the expression ‘i++ && j++ && k++’ is executed first. The result of this expression is 0 (-1 && -1 && 0 = 0). Now the expression is 0

        2 which evaluates to 1 (because OR operator always gives 1 except for ‘0

        0’ combination- for which it gives 0). So the value of m is 1. The values of other variables are also incremented by 1.


        8. main()

        {

        char *p;

        printf("%d %d ",sizeof(*p),sizeof(p));

        }


        Answer:

        1 2

        Explanation:

        The sizeof() operator gives the number of bytes taken by its operand. P is a character pointer, which needs one byte for storing its value (a character). Hence sizeof(*p) gives a value of 1. Since it needs two bytes to store the address of the character pointer sizeof(p) gives 2.


        9. main()

        {

        int i=3;

        switch(i)

        {

        default:printf("zero");

        case 1: printf("one");

        break;

        case 2:printf("two");

        break;

        case 3: printf("three");

        break;

        }

        }

        Answer :

        three

        Explanation :

        The default case can be placed anywhere inside the loop. It is executed only when all other cases doesn't match.


        10. main()

        {

        printf("%x",-1<<4);

        }

        Answer:

        fff0

        Explanation :

        -1 is internally represented as all 1's. When left shifted four times the least significant 4 bits are filled with 0's.The %x format specifier specifies that the integer value be printed as a hexadecimal value.


        11. main()

        {

        char string[]="Hello World";

        display(string);

        }

        void display(char *string)

        {

        printf("%s",string);

        }

        Answer:

        Compiler Error : Type mismatch in redeclaration of function display

        Explanation :

        In third line, when the function display is encountered, the compiler doesn't know anything about the function display. It assumes the arguments and return types to be integers, (which is the default type). When it sees the actual function display, the arguments and type contradicts with what it has assumed previously. Hence a compile time error occurs.


        12. main()

        {

        int c=- -2;

        printf("c=%d",c);

        }

        Answer:

        c=2;

        Explanation:

        Here unary minus (or negation) operator is used twice. Same maths rules applies, ie. minus * minus= plus.

        Note:

        However you cannot give like --2. Because -- operator can only be applied to variables as a decrement operator (eg., i--). 2 is a constant and not a variable.


        13. #define int char

        main()

        {

        int i=65;

        printf("sizeof(i)=%d",sizeof(i));

        }

        Answer:

        sizeof(i)=1

        Explanation:

        Since the #define replaces the string int by the macro char


        14. main()

        {

        int i=10;

        i=!i>14;

        Printf ("i=%d",i);

        }

        Answer:

        i=0


        Explanation:

        In the expression !i>14 , NOT (!) operator has more precedence than ‘ >’ symbol. ! is a unary logical operator. !i (!10) is 0 (not of true is false). 0>14 is false (zero).


        15. #include

        main()

        {

        char s[]={'a','b','c','\n','c','\0'};

        char *p,*str,*str1;

        p=&s[3];

        str=p;

        str1=s;

        printf("%d",++*p + ++*str1-32);

        }

        Answer:

        77

        Explanation:

        p is pointing to character '\n'. str1 is pointing to character 'a' ++*p. "p is pointing to '\n' and that is incremented by one." the ASCII value of '\n' is 10, which is then incremented to 11. The value of ++*p is 11. ++*str1, str1 is pointing to 'a' that is incremented by 1 and it becomes 'b'. ASCII value of 'b' is 98.

        Now performing (11 + 98 – 32), we get 77("M");

        So we get the output 77 :: "M" (Ascii is 77).


        16. #include

        main()

        {

        int a[2][2][2] = { {10,2,3,4}, {5,6,7,8} };

        int *p,*q;

        p=&a[2][2][2];

        *q=***a;

        printf("%d----%d",*p,*q);

        }

        Answer:

        SomeGarbageValue---1

        Explanation:

        p=&a[2][2][2] you declare only two 2D arrays, but you are trying to access the third 2D(which you are not declared) it will print garbage values. *q=***a starting address of a is assigned integer pointer. Now q is pointing to starting address of a. If you print *q, it will print first element of 3D array.


        17. #include

        main()

        {

        struct xx

        {

        int x=3;

        char name[]="hello";

        };

        struct xx *s;

        printf("%d",s->x);

        printf("%s",s->name);

        }

        Answer:

        Compiler Error

        Explanation:

        You should not initialize variables in declaration


        18. #include

        main()

        {

        struct xx

        {

        int x;

        struct yy

        {

        char s;

        struct xx *p;

        };

        struct yy *q;

        };

        }

        Answer:

        Compiler Error

        Explanation:

        The structure yy is nested within structure xx. Hence, the elements are of yy are to be accessed through the instance of structure xx, which needs an instance of yy to be known. If the instance is created after defining the structure the compiler will not know about the instance relative to xx. Hence for nested structure yy you have to declare member.


        19. main()

        {

        printf("\nab");

        printf("\bsi");

        printf("\rha");

        }

        Answer:

        hai

        Explanation:

        \n - newline

        \b - backspace

        \r - linefeed


        20. main()

        {

        int i=5;

        printf("%d%d%d%d%d%d",i++,i--,++i,--i,i);

        }

        Answer:

        45545

        Explanation:

        The arguments in a function call are pushed into the stack from left to right. The evaluation is by popping out from the stack. and the evaluation is from right to left, hence the result.


        21. #define square(x) x*x

        main()

        {

        int i;

        i = 64/square(4);

        printf("%d",i);

        }

        Answer:

        64

        Explanation:

        the macro call square(4) will substituted by 4*4 so the expression becomes i = 64/4*4 . Since / and * has equal priority the expression will be evaluated as (64/4)*4 i.e. 16*4 = 64


        22. main()

        {

        char *p="hai friends",*p1;

        p1=p;

        while(*p!='\0') ++*p++;

        printf("%s %s",p,p1);

        }

        Answer:

        ibj!gsjfoet

        Explanation:

        ++*p++ will be parse in the given order

         *p that is value at the location currently pointed by p will be taken

         ++*p the retrieved value will be incremented

         when ; is encountered the location will be incremented that is p++ will be executed

        Hence, in the while loop initial value pointed by p is ‘h’, which is changed to ‘i’ by executing ++*p and pointer moves to point, ‘a’ which is similarly changed to ‘b’ and so on. Similarly blank space is converted to ‘!’. Thus, we obtain value in p becomes “ibj!gsjfoet” and since p reaches ‘\0’ and p1 points to p thus p1doesnot print anything.


        23. #include

        #define a 10

        main()

        {

        #define a 50

        printf("%d",a);

        }

        Answer:

        50

        Explanation:

        The preprocessor directives can be redefined anywhere in the program. So the most recently assigned value will be taken.


        24. #define clrscr() 100

        main()

        {

        clrscr();

        printf("%d\n",clrscr());

        }

        Answer:

        100

        Explanation:

        Preprocessor executes as a seperate pass before the execution of the compiler. So textual replacement of clrscr() to 100 occurs.The input program to compiler looks like this :

        main()

        {

        100;

        printf("%d\n",100);

        }

        Note:

        100; is an executable statement but with no action. So it doesn't give any problem


        25. main()

        {

        printf("%p",main);

        }

        Answer:

        Some address will be printed.

        Explanation:

        Function names are just addresses (just like array names are addresses).

        main() is also a function. So the address of function main will be printed. %p in printf specifies that the argument is an address. They are printed as hexadecimal numbers.


        27) main()

        {

        clrscr();

        }

        clrscr();


        Answer:

        No output/error

        Explanation:

        The first clrscr() occurs inside a function. So it becomes a function call. In the second clrscr(); is a function declaration (because it is not inside any function).


        28) enum colors {BLACK,BLUE,GREEN}

        main()

        {


        printf("%d..%d..%d",BLACK,BLUE,GREEN);


        return(1);

        }

        Answer:

        0..1..2

        Explanation:

        enum assigns numbers starting from 0, if not explicitly defined.


        29) void main()

        {

        char far *farther,*farthest;


        printf("%d..%d",sizeof(farther),sizeof(farthest));


        }

        Answer:

        4..2

        Explanation:

        the second pointer is of char type and not a far pointer


        30) main()

        {

        int i=400,j=300;

        printf("%d..%d");

        }

        Answer:

        400..300

        Explanation:

        printf takes the values of the first two assignments of the program. Any number of printf's may be given. All of them take only the first two values. If more number of assignments given in the program,then printf will take garbage values.


        31) main()

        {

        char *p;

        p="Hello";

        printf("%c\n",*&*p);

        }

        Answer:

        H

        Explanation:

        * is a dereference operator & is a reference operator. They can be applied any number of times provided it is meaningful. Here p points to the first character in the string "Hello". *p dereferences it and so its value is H. Again & references it to an address and * dereferences it to the value H.


        32) main()

        {

        int i=1;

        while (i<=5)

        {

        printf("%d",i);

        if (i>2)

        goto here;

        i++;

        }

        }

        fun()

        {

        here:

        printf("PP");

        }

        Answer:

        Compiler error: Undefined label 'here' in function main

        Explanation:

        Labels have functions scope, in other words The scope of the labels is limited to functions . The label 'here' is available in function fun() Hence it is not visible in function main.


        33) main()

        {

        static char names[5][20]={"pascal","ada","cobol","fortran","perl"};

        int i;

        char *t;

        t=names[3];

        names[3]=names[4];

        names[4]=t;

        for (i=0;i<=4;i++)

        printf("%s",names[i]);

        }

        Answer:

        Compiler error: Lvalue required in function main

        Explanation:

        Array names are pointer constants. So it cannot be modified.


        34) void main()

        {

        int i=5;

        printf("%d",i++ + ++i);

        }

        Answer:

        Output Cannot be predicted exactly.

        Explanation:

        Side effects are involved in the evaluation of i


        35) void main()

        {

        int i=5;

        printf("%d",i+++++i);

        }

        Answer:

        Compiler Error

        Explanation:

        The expression i+++++i is parsed as i ++ ++ + i which is an illegal combination of operators.


        36) #include

        main()

        {

        int i=1,j=2;

        switch(i)

        {

        case 1: printf("GOOD");

        break;

        case j: printf("BAD");

        break;

        }

        }

        Answer:

        Compiler Error: Constant expression required in function main.

        Explanation:

        The case statement can have only constant expressions (this implies that we cannot use variable names directly so an error).

        Note:

        Enumerated types can be used in case statements.


        37) main()

        {

        int i;

        printf("%d",scanf("%d",&i)); // value 10 is given as input here

        }

        Answer:

        1

        Explanation:

        Scanf returns number of items successfully read and not 1/0. Here 10 is given as input which should have been scanned successfully. So number of items read is 1.


        38) #define f(g,g2) g##g2

        main()

        {

        int var12=100;

        printf("%d",f(var,12));

        }

        Answer:

        100


        39) main()

        {

        int i=0;


        for(;i++;printf("%d",i)) ;

        printf("%d",i);

        }

        Answer:

        1

        Explanation:

        before entering into the for loop the checking condition is "evaluated". Here it evaluates to 0 (false) and comes out of the loop, and i is incremented (note the semicolon after the for loop).


        40) #include

        main()

        {

        char s[]={'a','b','c','\n','c','\0'};

        char *p,*str,*str1;
        Read more ...

        Enum: JPA and Enums via @Enumerated

        It can sometimes be desirable to have a Java enum type to represent a particular column in a database. JPA supports converting database data to and from Java enum types via the @javax.persistence.Enumerated annotation.
        This example will show basic @Enumerated usage in a field of an @Entity as well as enums as the parameter of a Query. We'll also see that the actual database representation can be effectively String or int.

        Enum

        For our example we will leverage the familiar Movie entity and add a new field to represent the MPAA.org rating of the movie. This is defined via a simple enumthat requires no JPA specific annotations.
        public enum Rating {
            UNRATED,
            G,
            PG,
            PG13,
            R,
            NC17
        }

        @Enumerated

        In our Movie entity, we add a rating field of the enum type Rating and annotate it with @Enumerated(EnumType.STRING) to declare that its value should be converted from what is effectively a String in the database to the Rating type.
        @Entity
        public class Movie {
        
            @Id
            @GeneratedValue
            private int id;
            private String director;
            private String title;
            private int year;
        
            @Enumerated(EnumType.STRING)
            private Rating rating;
        
            public Movie() {
            }
        
            public Movie(String director, String title, int year, Rating rating) {
                this.director = director;
                this.title = title;
                this.year = year;
                this.rating = rating;
            }
        
            public String getDirector() {
                return director;
            }
        
            public void setDirector(String director) {
                this.director = director;
            }
        
            public String getTitle() {
                return title;
            }
        
            public void setTitle(String title) {
                this.title = title;
            }
        
            public int getYear() {
                return year;
            }
        
            public void setYear(int year) {
                this.year = year;
            }
        
            public Rating getRating() {
                return rating;
            }
        
            public void setRating(Rating rating) {
                this.rating = rating;
            }
        }
        The above is enough and we are effectively done. For the sake of completeness we'll show a sample Query

        Enum in JPQL Query

        Note the findByRating method which creates a Query with a rating named parameter. The key thing to notice is that the rating enum instance itself is passed into the query.setParameter method, not rating.name() or rating.ordinal().
        Regardless if you use EnumType.STRING or EnumType.ORDINAL, you still always pass the enum itself in calls to query.setParameter.
        @Stateful
        public class Movies {
        
            @PersistenceContext(unitName = "movie-unit", type = PersistenceContextType.EXTENDED)
            private EntityManager entityManager;
        
            public void addMovie(Movie movie) {
                entityManager.persist(movie);
            }
        
            public void deleteMovie(Movie movie) {
                entityManager.remove(movie);
            }
        
            public List<Movie> findByRating(Rating rating) {
                final Query query = entityManager.createQuery("SELECT m FROM Movie as m WHERE m.rating = :rating");
                query.setParameter("rating", rating);
                return query.getResultList();
            }
        
            public List<Movie> getMovies() throws Exception {
                Query query = entityManager.createQuery("SELECT m from Movie as m");
                return query.getResultList();
            }
        
        }

        EnumType.STRING vs EnumType.ORDINAL

        It is a matter of style how you would like your enum data represented in the database. Either name() or ordinal() are supported:
        • @Enumerated(EnumType.STRING) Rating rating the value of rating.name() is written and read from the corresponding database column; e.g. GPG,PG13
        • @Enumerated(EnumType.ORDINAL) Rating rating the value of rating.ordinal() is written and read from the corresponding database column; e.g. 0,12
        The default is EnumType.ORDINAL
        There are advantages and disadvantages to each.

        Disadvantage of EnumType.ORDINAL

        A disadvantage of EnumType.ORDINAL is the effect of time and the desire to keep enums in a logical order. With EnumType.ORDINAL any new enum elements must be added to the end of the list or you will accidentally change the meaning of all your records.
        Let's use our Rating enum and see how it would have had to evolve over time to keep up with changes in the MPAA.org ratings system.
        1980
        public enum Rating {
            G,
            PG,
            R,
            UNRATED
        }
        1984 PG-13 is added
        public enum Rating {
            G,
            PG,
            R,
            UNRATED,
            PG13
        }
        1990 NC-17 is added
        public enum Rating {
            G,
            PG,
            R,
            UNRATED,
            PG13,
            NC17
        }
        If EnumType.STRING was used, then the enum could be reordered at anytime and would instead look as we have defined it originally with ratings starting at Gand increasing in severity to NC17 and eventually UNRATED. With EnumType.ORDINAL the logical ordering would not have withstood the test of time as new values were added.
        If the order of the enum values is significant to your code, avoid EnumType.ORDINAL

        Unit Testing the JPA @Enumerated

        public class MoviesTest extends TestCase {
        
            public void test() throws Exception {
        
                final Properties p = new Properties();
                p.put("movieDatabase", "new://Resource?type=DataSource");
                p.put("movieDatabase.JdbcDriver", "org.hsqldb.jdbcDriver");
                p.put("movieDatabase.JdbcUrl", "jdbc:hsqldb:mem:moviedb");
        
                EJBContainer container = EJBContainer.createEJBContainer(p);
                final Context context = container.getContext();
        
                final Movies movies = (Movies) context.lookup("java:global/jpa-scratch/Movies");
        
                movies.addMovie(new Movie("James Frawley", "The Muppet Movie", 1979, Rating.G));
                movies.addMovie(new Movie("Jim Henson", "The Great Muppet Caper", 1981, Rating.G));
                movies.addMovie(new Movie("Frank Oz", "The Muppets Take Manhattan", 1984, Rating.G));
                movies.addMovie(new Movie("James Bobin", "The Muppets", 2011, Rating.PG));
        
                assertEquals("List.size()", 4, movies.getMovies().size());
        
                assertEquals("List.size()", 3, movies.findByRating(Rating.G).size());
        
                assertEquals("List.size()", 1, movies.findByRating(Rating.PG).size());
        
                assertEquals("List.size()", 0, movies.findByRating(Rating.R).size());
        
                container.close();
            }
        }

        Running

        To run the example via maven:
        cd jpa-enumerated
        mvn clean install
        Which will generate output similar to the following:
        -------------------------------------------------------
         T E S T S
        -------------------------------------------------------
        Running org.superbiz.jpa.enums.MoviesTest
        Apache OpenEJB 4.0.0-beta-2    build: 20120115-08:26
        http://tomee.apache.org/
        INFO - openejb.home = /Users/dblevins/openejb/examples/jpa-enumerated
        INFO - openejb.base = /Users/dblevins/openejb/examples/jpa-enumerated
        INFO - Using 'javax.ejb.embeddable.EJBContainer=true'
        INFO - Configuring Service(id=Default Security Service, type=SecurityService, provider-id=Default Security Service)
        INFO - Configuring Service(id=Default Transaction Manager, type=TransactionManager, provider-id=Default Transaction Manager)
        INFO - Configuring Service(id=movieDatabase, type=Resource, provider-id=Default JDBC Database)
        INFO - Found EjbModule in classpath: /Users/dblevins/openejb/examples/jpa-enumerated/target/classes
        INFO - Beginning load: /Users/dblevins/openejb/examples/jpa-enumerated/target/classes
        INFO - Configuring enterprise application: /Users/dblevins/openejb/examples/jpa-enumerated
        INFO - Configuring Service(id=Default Stateful Container, type=Container, provider-id=Default Stateful Container)
        INFO - Auto-creating a container for bean Movies: Container(type=STATEFUL, id=Default Stateful Container)
        INFO - Configuring Service(id=Default Managed Container, type=Container, provider-id=Default Managed Container)
        INFO - Auto-creating a container for bean org.superbiz.jpa.enums.MoviesTest: Container(type=MANAGED, id=Default Managed Container)
        INFO - Configuring PersistenceUnit(name=movie-unit)
        INFO - Auto-creating a Resource with id 'movieDatabaseNonJta' of type 'DataSource for 'movie-unit'.
        INFO - Configuring Service(id=movieDatabaseNonJta, type=Resource, provider-id=movieDatabase)
        INFO - Adjusting PersistenceUnit movie-unit  to Resource ID 'movieDatabaseNonJta' from 'movieDatabaseUnmanaged'
        INFO - Enterprise application "/Users/dblevins/openejb/examples/jpa-enumerated" loaded.
        INFO - Assembling app: /Users/dblevins/openejb/examples/jpa-enumerated
        INFO - PersistenceUnit(name=movie-unit, provider=org.apache.openjpa.persistence.PersistenceProviderImpl) - provider time 406ms
        INFO - Jndi(name="java:global/jpa-enumerated/Movies!org.superbiz.jpa.enums.Movies")
        INFO - Jndi(name="java:global/jpa-enumerated/Movies")
        INFO - Created Ejb(deployment-id=Movies, ejb-name=Movies, container=Default Stateful Container)
        INFO - Started Ejb(deployment-id=Movies, ejb-name=Movies, container=Default Stateful Container)
        INFO - Deployed Application(path=/Users/dblevins/openejb/examples/jpa-enumerated)
        INFO - Undeploying app: /Users/dblevins/openejb/examples/jpa-enumerated
        INFO - Closing DataSource: movieDatabase
        INFO - Closing DataSource: movieDatabaseNonJta
        Tests run: 1, Failures: 0, Errors: 0, Skipped: 0, Time elapsed: 2.831 sec
        
        Results :
        
        Tests run: 1, Failures: 0, Errors: 0, Skipped: 0
        Read more ...

        My Favorite Site's List

        #update below script more than 500 posts